Boot Sequence
Machines are bare-metal or virtualized computers designated as worker nodes for the Kubernetes control planes hosted on the meltcloud platform.
This page explains the boot sequence of a Machine to join the cluster.
Prerequisites
The boot process leverages iPXE to directly boot from the meltcloud platform over the network. Therefore, it requires the following:
- a DHCP server configured to assign network configuration to the machine
- a DNS server configured to resolve the meltcloud platform endpoints
- HTTPS connectivity from the Machine to the meltcloud platform (see Networking - Port Matrix for details)
- a way for the Machine to boot iPXE artifacts. All iPXE artifacts have the necessary credentials and endpoints baked in, so that booting them directly converts the Machine to a running Kubernetes worker node that's assigned to your organization.
The different iPXE artifact options are listed below – choose one that suits your Machine capabilities and deployment landscape.
How to boot meltcloud iPXE Boot Artifacts
Option 1: Boot from .iso
The easiest way is to download the iPXE Boot ISO generated by the meltcloud platform and provide it as a boot medium to the Machine:
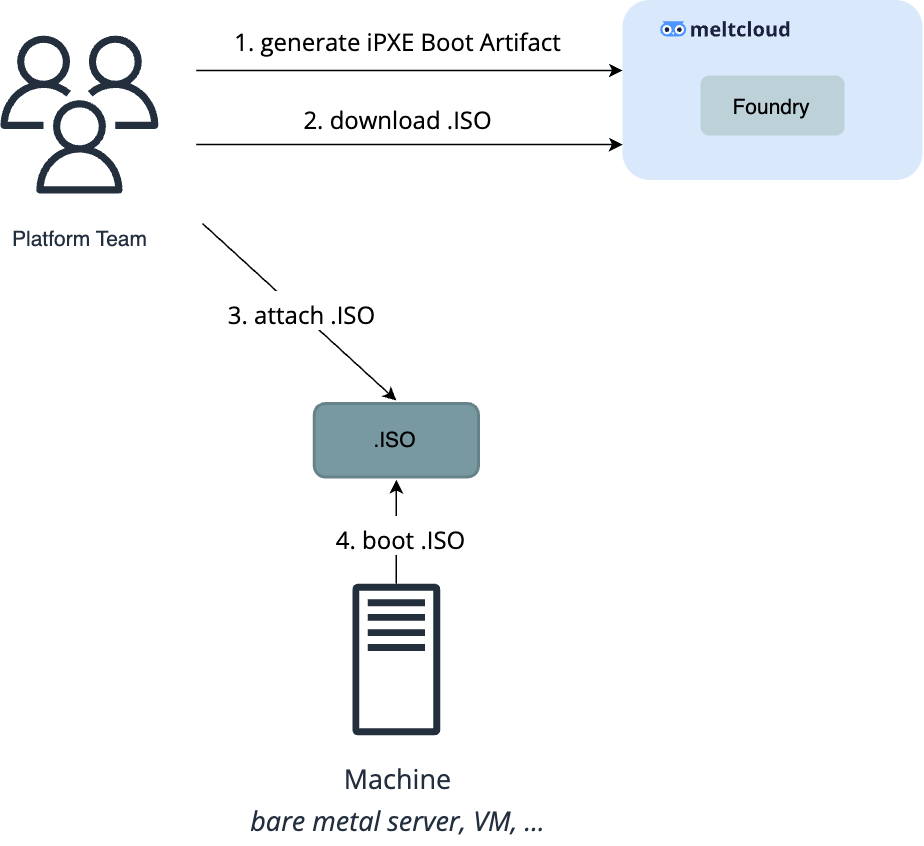
Be aware that if you want to bring your own CA/certificate for authentication, you have to create the ISO yourself.
Option 2: Boot via TFTP / HTTPBoot
If you prefer not passing an ISO but boot from a central location, you can download the iPXE .undionly/.uefi artifacts generated by the meltcloud Console and pass it to the Machines via TFTP/HTTPBoot.
For UEFI-capable Machines, you can boot the .uefi file via either TFTP or HTTPBoot:
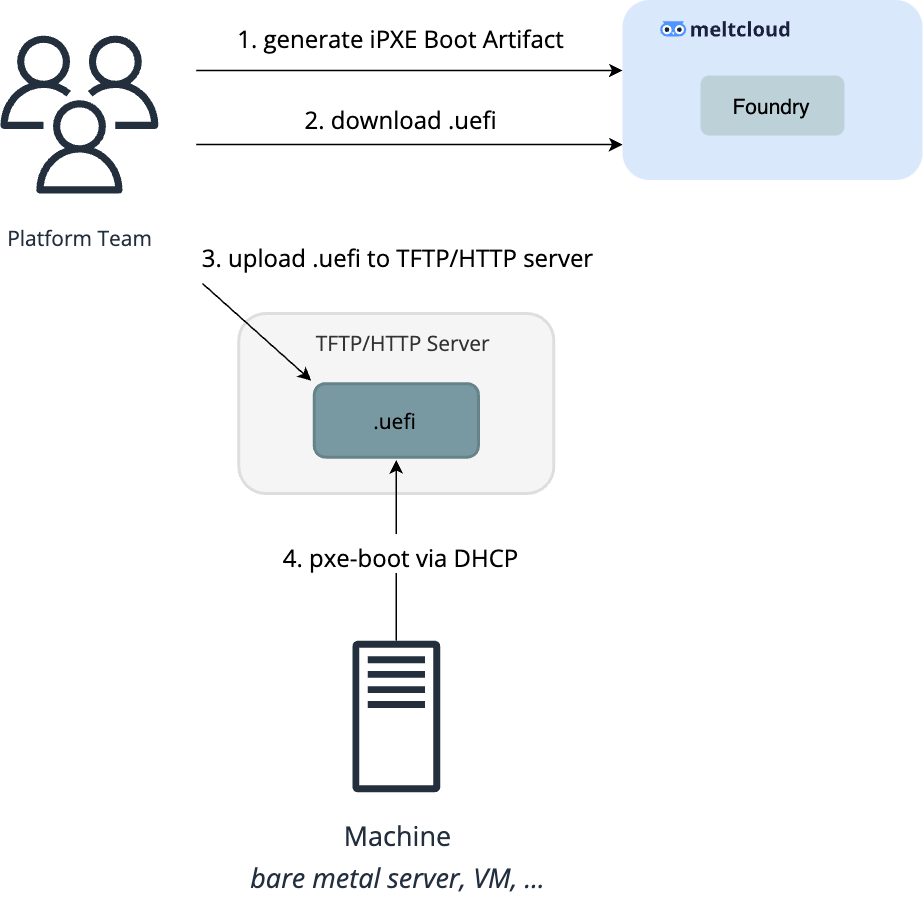
For legacy-BIOS Machines, you need to boot the .undionly file via TFTP:
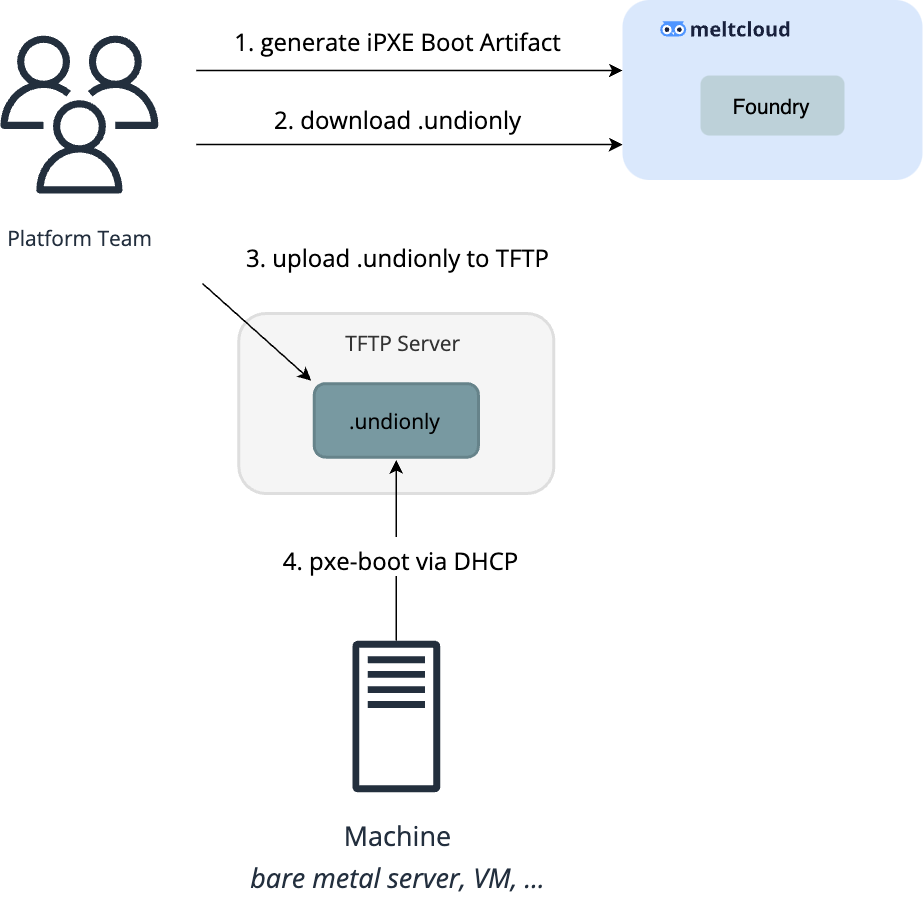
Be aware that if you want to bring your own CA/certificate for authentication, you have to create the PXE/UEFI artifacts yourself.
Option 3: Boot via UEFI HTTP(S) Boot from meltcloud platform
Newer servers support UEFI HTTP Boot: booting from an HTTP or HTTPS endpoint.
The meltcloud platform offers HTTP and HTTPS endpoints for the generated artifacts, so servers capable of UEFI HTTP Boot can directly boot from the meltcloud platform. This way, you don't have to run a TFTP or HTTP server yourself.
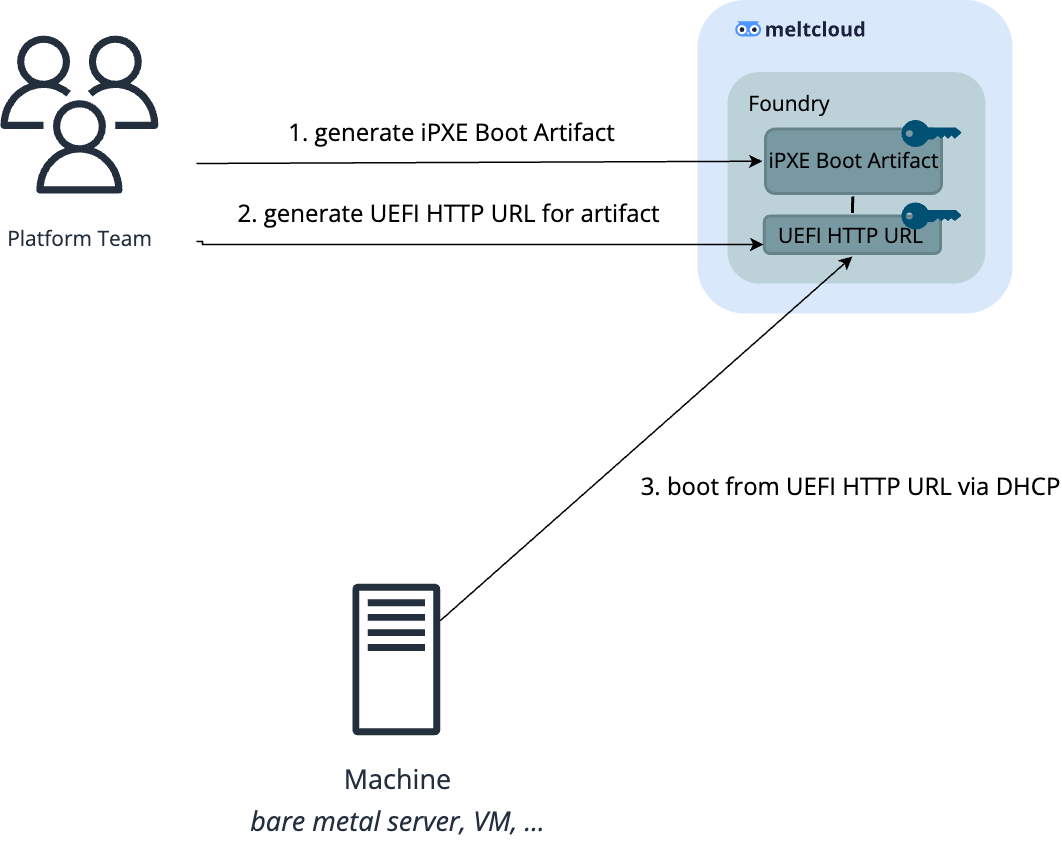
Follow Create UEFI HTTP Boot URLs for detailed steps.
Be aware that if you want to bring your own CA/certificate for authentication, it's not possible to HTTP-boot directly from meltcloud, since the artifacts are not stored on the platform.
Option 4: Boot from remote iPXE Chain URL
Some providers allow booting from a remote iPXE URL. For this use case, see Option 3: Boot from remote iPXE Chain URL with a secure token
Sequence
Once the machine has booted the iPXE artifact, it follows the following steps to convert the Machine into a fully functioning Kubernetes worker node:
- use the baked-in X509 client certificate to authenticate against the meltcloud platform and load the iPXE boot script (
GET /ipxe/boot) - the iPXE boot script downloads the immutable OS (based on Flatcar Container Linux) and boots it
- Flatcar Linux retrieves a Machine-specific remote ignition.json (
GET /ipxe/ignition) which contains the machine configuration (packages to install, network settings, ...) - Flatcar Linux starts the necessary services (Kubelet, Kubeadm, ...) and joins the Kubernetes cluster
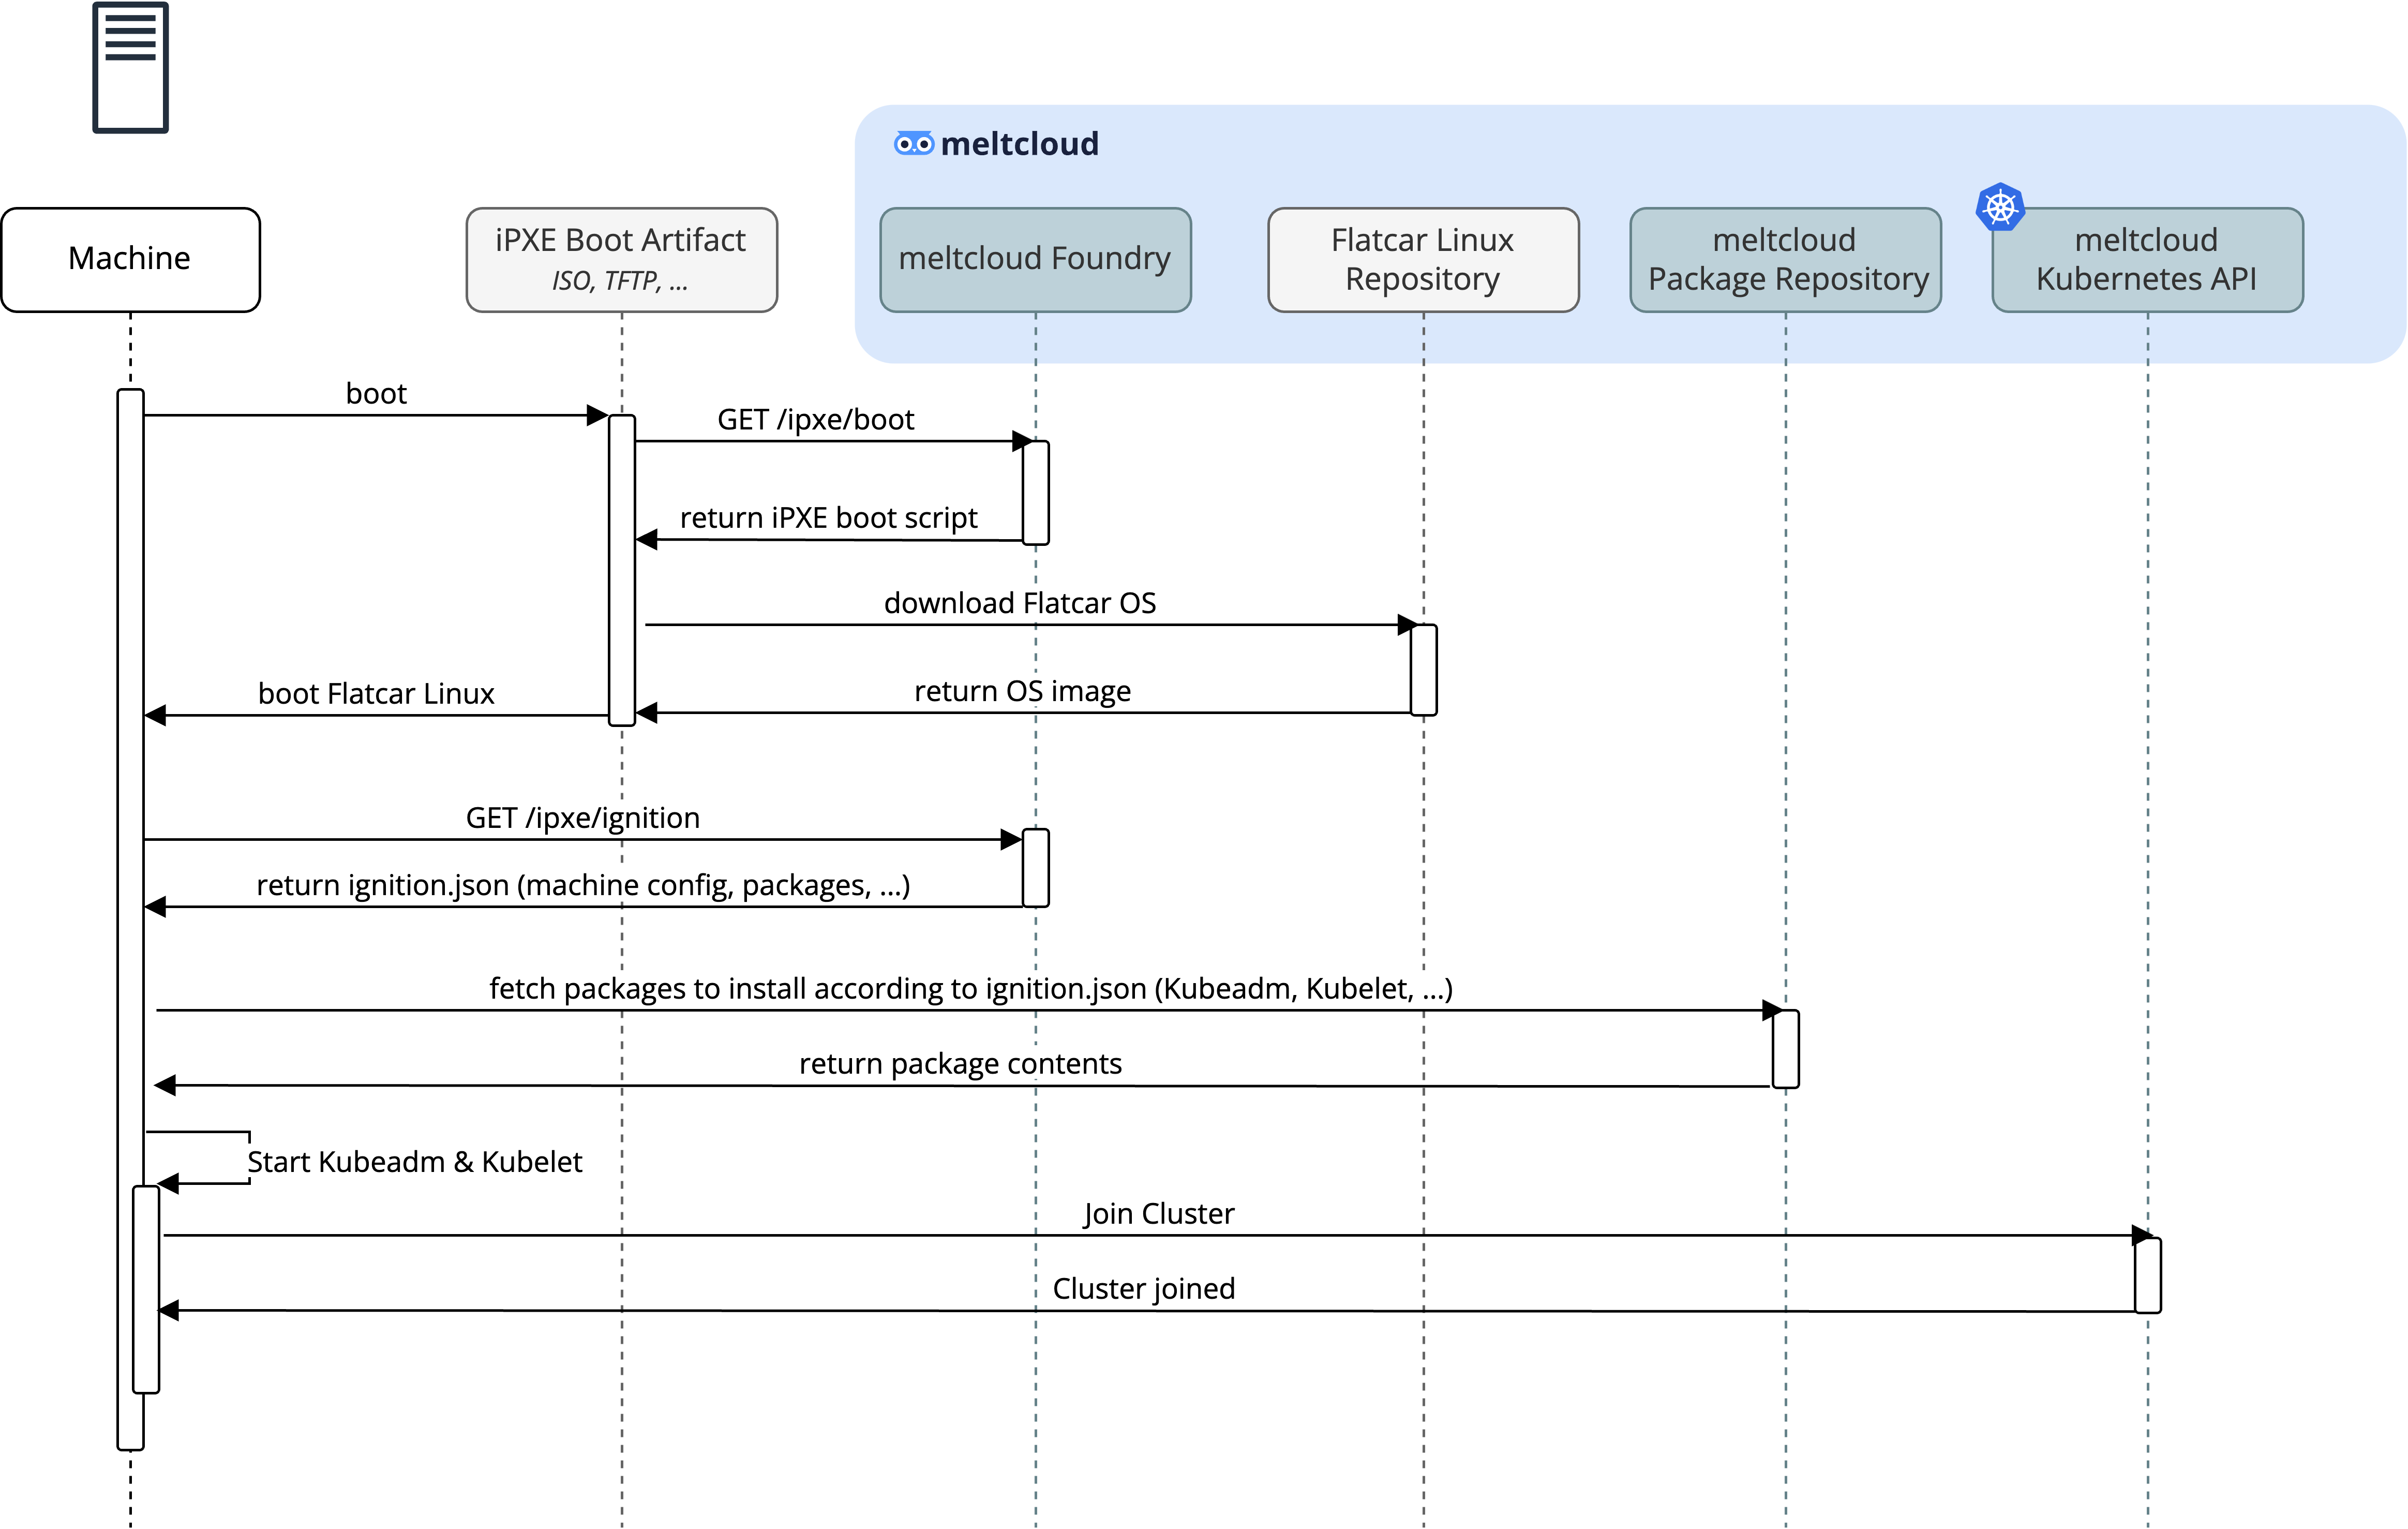
Once part of the cluster, the Machine will be fully managed and lifecycled by the meltcloud platform (patches, version upgrades, ...)
iPXE Authentication
There are various ways how Machines authenticate themselves against the meltcloud platform on boot time. It's important to select an option that fulfills your security requirements.
Option 1: meltcloud-generated X509 client certificates
The easiest way is to generate the iPXE Boot Artifacts in the meltcloud platform.
Every set of iPXE Boot Artifacts will contain its own auto-generated X509 client certificate keypair, which the Foundry will check during boot time against all valid boot artifacts from your organization:
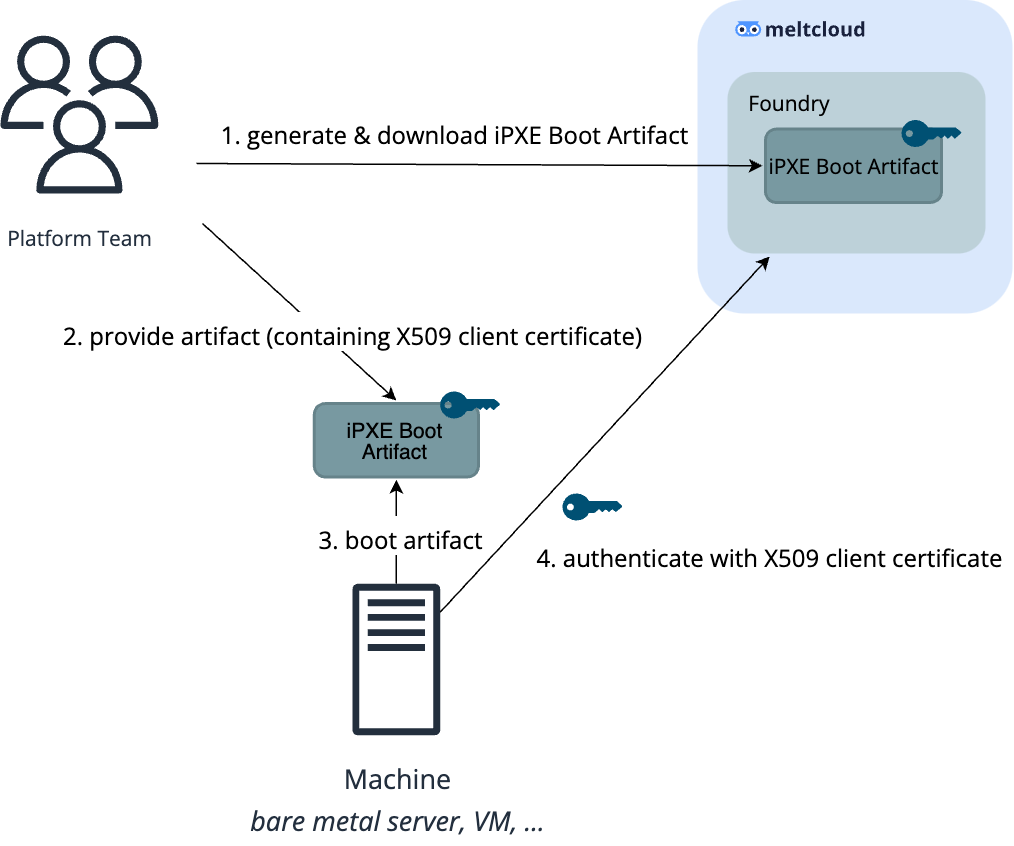
You can always generate a new set of artifacts to rotate the certificates, or delete the artifacts to revoke them.
Option 2: Bring your own CA/certificate
If you don't want to use a client certificate issued by the meltcloud platform but your own CA, you can register your CA as a trusted CA in the meltcloud platform.
This has the following advantages:
- You can use your own, established CA and the processes surrounding it
- The client certificate keypair is generated on-premises and never leave them
However, since the client certificate key should never leave your device, the meltcloud platform cannot generate the iPXE Boot Artifacts for you, so you have to generate them yourselves locally – you can use our melt/ipxe-builder Docker Image for that.
The complete process looks as follows:
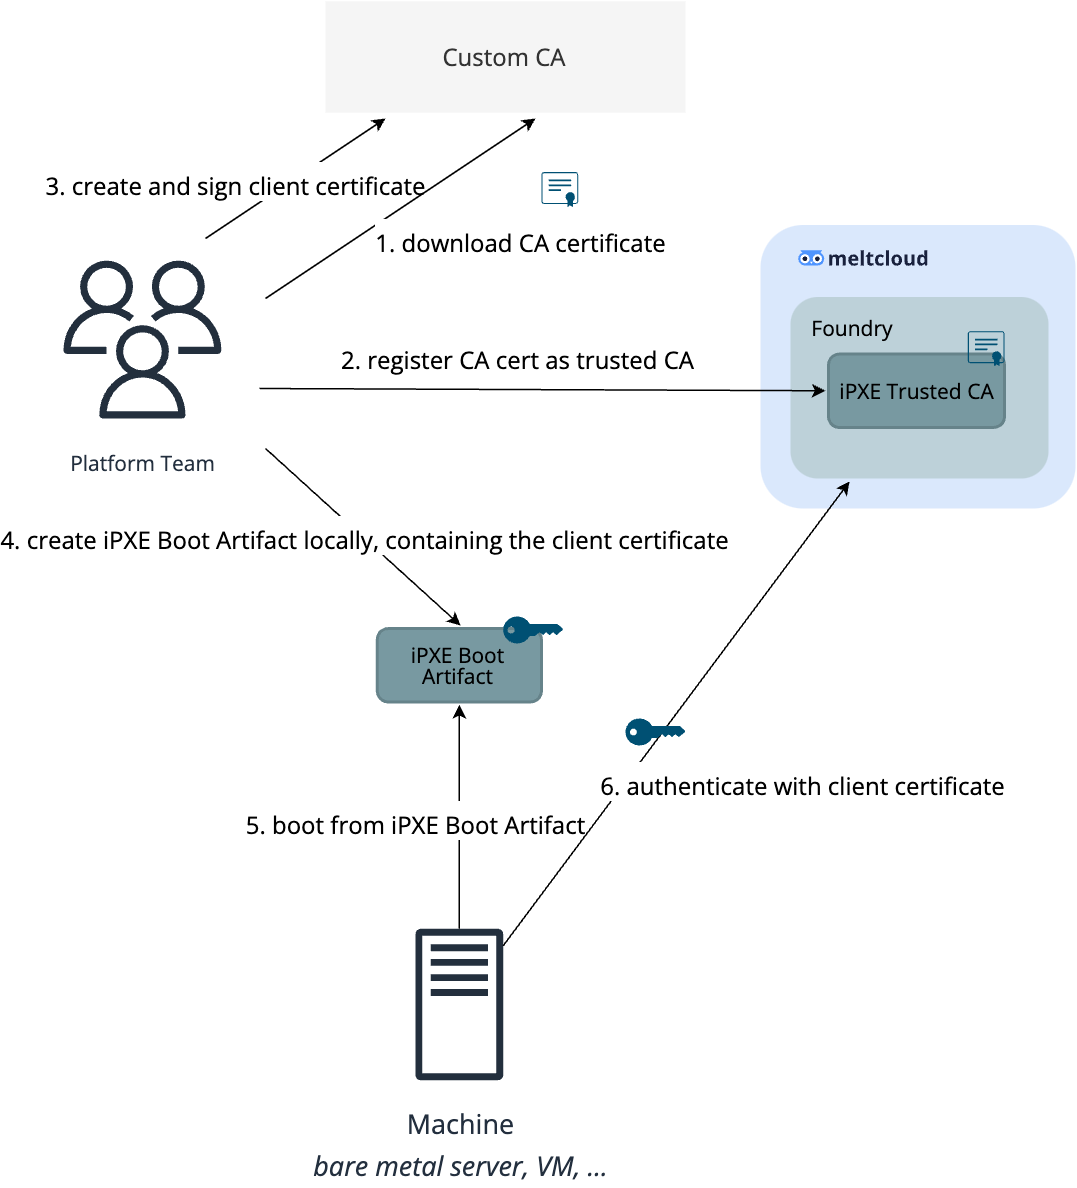
Be aware that meltcloud will trust all client certificates issued by your CA. If you want to only allow specific certificates, you can register a specific certificate instead ("certificate pinning"). This has the nice effect that you can revoke the certificate, which might not be possible if the OCSP/CRL endpoints of your CA are not be reachable from the meltcloud foundry.
To allow for rotation, you can trust multiple CAs/certificates. To revoke them, simply delete them from the trusted CA/certificates list in the platform.
INFO
For highest security requirements, we recommend pinning selected certificates from your CA and rotating them frequently.
Option 3: Boot from remote iPXE Chain URL using a secure token
Some providers allow booting from a remote iPXE URL (chain loading). For this use case, you can generate an iPXE Chain URL in the meltcloud platform and pass it on boot time:
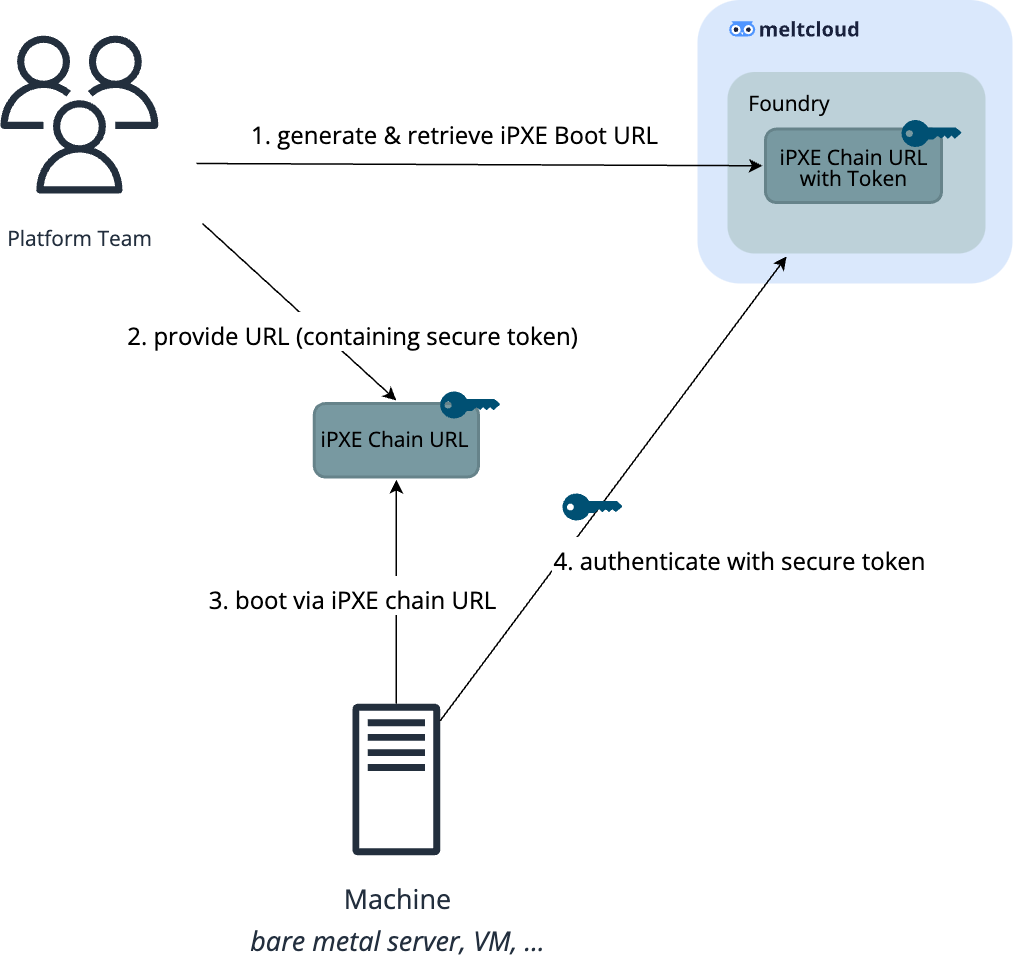
INFO
Be aware that this will not use client certificate authentication but a secure token as part of the URL instead, which offers a slightly lower security level than client certificates.
