Quickstart
A typical meltcloud Kubernetes environment consists of a SaaS-hosted Kubernetes API and bring-your-own-worker-nodes called Machines.
Follow these steps to set up a fully managed Kubernetes environment with a local worker in just a few minutes.
Create a Cluster
- Log in to app.meltcloud.io
- Navigate to Clusters → Create Cluster to create a Cluster by providing a unique name and the Kubernetes version you'd like to use.
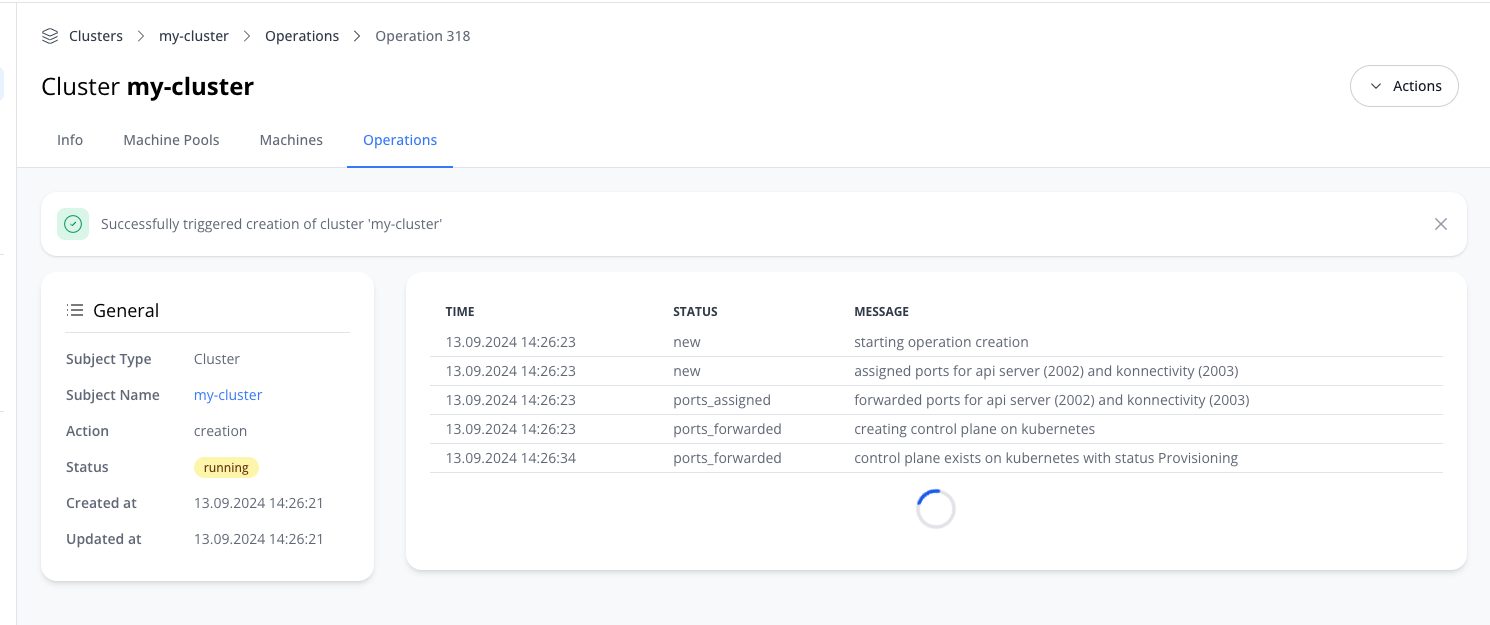
- Hit Create Cluster. You can now observe how the control plane is being provisioned by following the operations log:
Once your cluster is ready, grab the .kubeconfig file from the Info page, which will grant you full access to the cluster.
export KUBECONFIG=/path/to/my/cluster.kubeconfig
kubectl cluster-info
kubectl get nodes
# check if any nodes are connected
# must be an empty list for newly created clusters without assigned machines
Create a Machine Pool
A Machine Pool is used as a grouping entity where you will later assign your machines to.
Machine Pools typically share a set of common configuration such as version, storage or network configuration. Although meltcloud will not install anything onto your machine, a locally attached disk is still required as an ephemeral device to store temporary data such as locally cached images.
- After the cluster has been created, navigate to the Machine Pools tab in the newly created cluster.
- Choose an appropriate name, leave the default version, and use
/dev/vdaas primary disk (QEMU uses that path for its first disk) - Hit Save Machine Pool.
Create an iPXE Boot Artifact
An iPXE Boot Artifact enables your machines to securely boot and join your Kubernetes cluster. It contains a uniquely created X509 client certificate and private key.
INFO
Anyone with a valid boot artifact might provision machines into your organization, so treat it with care.
- Go to Boot Config → iPXE Boot Artifact to create a new artifact.
Once finished, it offers you a set of images to boot from:
| Image File | Architecture | Usage |
|---|---|---|
ipxe.iso | amd64/arm64 | Standard bootable ISO file. It can be mounted in a virtual environment or flashed to a USB/SD-card style device to boot your machines |
undionly.kpxe | amd64 | Used for network booting using PXE on legacy PCBIOS systems |
ipxe.efi | amd64 | Used for network booting using PXE on amd64 UEFI based systems |
ipxe.efi | arm64 | Used for network booting using PXE on arm64 UEFI based systems |
ipxe.raw | amd64 | Used for booting iPXE from a locally attacherd bootable disk image |
- Download the
ipxe.isofile.
Launch a Virtual Machine with QEMU
Directly launch a virtual machine using QEMU and the previously generated ipxe.iso boot image.
# install QEMU
brew install qemu

# setup a path to store your QEMU VM files
disk_path=$HOME/qemu/melt-vm
mkdir -p ${disk_path}

# create a disk for the ephemeral root device that holds docker images
qemu-img create -f qcow2 ${disk_path}/melt-node.qcow2 10g

# iPXE ISO path - adjust if needed
ipxe_iso="$HOME/Downloads/ipxe.iso"

# assign a UUID - be aware that creating a new UUID will create a new machine in meltcloud
machine_uuid=$(uuidgen)

mem=3G # requires at least 3GB - give more for more workload
cpus=6 # no minimum requirement for CPU, but let's give it some power!

# start the machine (Ctrl-a, release, hit x to exit)
qemu-system-aarch64 \
  -uuid $machine_uuid \
  -m $mem \
  -smp $cpus \
  -device nec-usb-xhci,id=usb-bus \
  -device usb-storage,drive=ipxe-iso,removable=true,bootindex=0,bus=usb-bus.0 \
  -drive if=none,id=ipxe-iso,media=cdrom,file=${ipxe_iso},readonly=on \
  -drive file=$(brew --prefix qemu)/share/qemu/edk2-aarch64-code.fd,if=pflash,format=raw \
  -drive file=${disk_path}/melt-node.qcow2,if=virtio \
  -netdev user,id=n1 \
  -device virtio-net-pci,netdev=n1,bus=pcie.0,addr=0x19 \
  -nographic \
  -cpu host \
-machine type=virt-9.0,accel=hvf# install QEMU
sudo apt install qemu-system libvirt-clients libvirt-daemon-system
sudo adduser `id -un` libvirt
sudo adduser `id -un` kvm
# create a disk for the ephemeral root device
DISK_PATH=~/melt-node.qcow2
qemu-img create -f qcow2 $DISK_PATH 10g
# give QEMU access to the disk file
sudo chown libvirt-qemu:kvm "$DISK_PATH"
pushd $(dirname $DISK_PATH)
setfacl -m user:libvirt-qemu:--x $(pwd)
while [[ $(pwd) != $HOME ]]; do
cd ..
pwd
setfacl -m user:libvirt-qemu:--x $(pwd)
done
popd
# iPXE ISO path (Download from meltcloud foundry)
IPXE_ISO=~/Downloads/ipxe.iso
# assign a UUID - be aware that creating a new UUID will create a new machine in meltcloud
machine_uuid=$(uuidgen)
# start the machine (To exit press Alt + 2, then type "quit")
sudo qemu-system-x86_64 \
-uuid $machine_uuid \
-m size=3276800k \
-accel kvm \
-smp 2,sockets=2,cores=1,threads=1 \
-object '{"qom-type":"memory-backend-ram","id":"pc.ram","size":3355443200}' \
-machine pc-i440fx-mantic,usb=off,vmport=off,dump-guest-core=off,memory-backend=pc.ram,hpet=off,acpi=on \
-cdrom $IPXE_ISO \
-display curses \
-cpu host \
-netdev user,id=hostnet0 \
-device e1000,netdev=hostnet0,bus=pci.0,addr=0x3 \
-drive file=$DISK_PATH,if=virtio \
-boot order=dIt should look as follows:
Assign the Machine
- After your Machine started up successfully, go to Machines → Your Machine → Actions → Edit Machine and assign it to your desired machine pool.
Assigning your machine to a machine pool will automatically trigger a reboot and reconfiguration of your machine.
Verify your cluster
You did it! It's time to verify. Once your machine reboots, it will automatically join the Kubernetes cluster associated with your machine pool.
export KUBECONFIG=/path/to/my/cluster.kubeconfig
kubectl get nodes
# you should see your nodes appear here
The nodes will likely show as NotReady due to the lack of a CNI installation.
For example, to install Cilium as a CNI:
helm repo add cilium https://helm.cilium.io/
helm install cilium cilium/cilium --version 1.16.1 \
   --namespace kube-system \
   --set image.pullPolicy=IfNotPresent \
   --set ipam.mode=kubernetes